A Tutorial for Wood Panelled Walls in the Bathroom
Initially when we were planning our new bathroom, we were heading towards having tiled walls. White metro tiles, to be exact. I’ve got a pallet of them sitting in my cellar, ready to go the walls. Unfortunately for those tiles, I changed my mind and decided to go for wood panelling. It was easy to do and looks great, so I thought I’d type up a tutorial for wood panelled walls in the bathroom (you know, for keywords sake).
At first I wasn’t sure if it would work. We have a shower over the bath, which is an added complication. There don’t seem to be many bathrooms with wall panelling AND a shower. I decided to give it a go, and if the wood panelling ends up ruined I can always use THOSE metro tiles.
I’ve taken every step I can think of to minimise water damage to the wood. I used exterior grade plywood for the base, which I waterproofed before we put it up. I varnished it once it was on the walls. I then used eggshell paint to paint it, and clear silicone sealant to the corner joint and the joint between the walls and the floor. We have two shower curtains, so when you have a shower you’re in a cocoon of curtain. We did the bathroom last May (or March, I can’t remember) and it still looks exactly the same as it did then, despite 3 people showering at least once a day.


My first job was to hack off the disgusting brown tiles the previous owners had installed. Why they went for brown, I’ll never know. Once the tiles were off and the picture rail was down, I gave the walls a sweep and a hoover with good old Henry. You can’t DIY without Henry!

We bought the plywood sheets from a local woodyard who cut it it to size for us and delivered it. We can fit a lot in Pierre, our trusty 206, but these sheets of wood were way too big. I wanted the pieces to be 2350mm to reach the picture rail and the sheets come in a 2440mm size. We used two and a bit sheets for the back wall and a piece 1060mm wide by 2350mm tall for the bit behind the shower. We attached the sheets to the wall using Stixall (recommended by our plumber and it’s amazing stuff, way better than other adhesives).

When these had dried, we attached our chunky panel pieces. Each of them is 10cm wide and I had the woodyard cut them to length for me, so all we had to so was sand, prime, varnish, stick them on and paint them. It saved us so much time and meant that they were cut properly (Mr R and I aren’t the neatest with a saw).

Once we had attached the thicker panel pieces we attached a decorative piece of moulding which we cut to size using a mitre box and tenon saw. We used panel pins to hold any loose pieces in place while the adhesive dried. I’m sorry there are no more detailed pictures – by this point in the project we were so tired and fed up we just wanted to get it done! I hadn’t had a proper shower in 3 days and felt rank!
Also, you see that panel where the shower was? We couldn’t work out how to make the panelling fit round the shower and ended up making it look rubbish. We took this photo on Sunday night at 10pm while I was finishing the painting, and the plumber was due back on Monday morning to fit the bath. Imagine Mr R’s joy on Monday morning when I sent him back to the woodyard to get another piece of wood to be the back board for behind the shower and then started ripping off the wood panelling so we could redo it! Thankfully the plumber had had an emergency call out so couldn’t come to us until after lunch. This gave us enough time to redo it so it looks way better now.

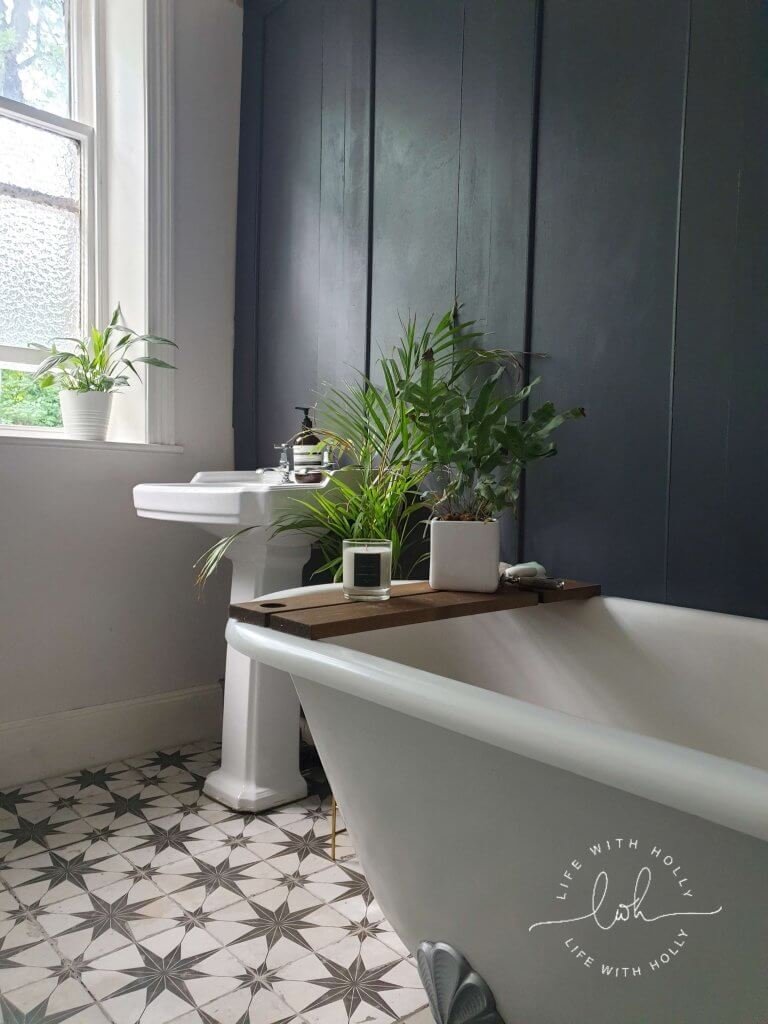
When the whole lot was up I gave it a couple of coats of paint. I used the Valspar colour match of Railings by Farrow and Ball as it was a lot cheaper than the genuine stuff.

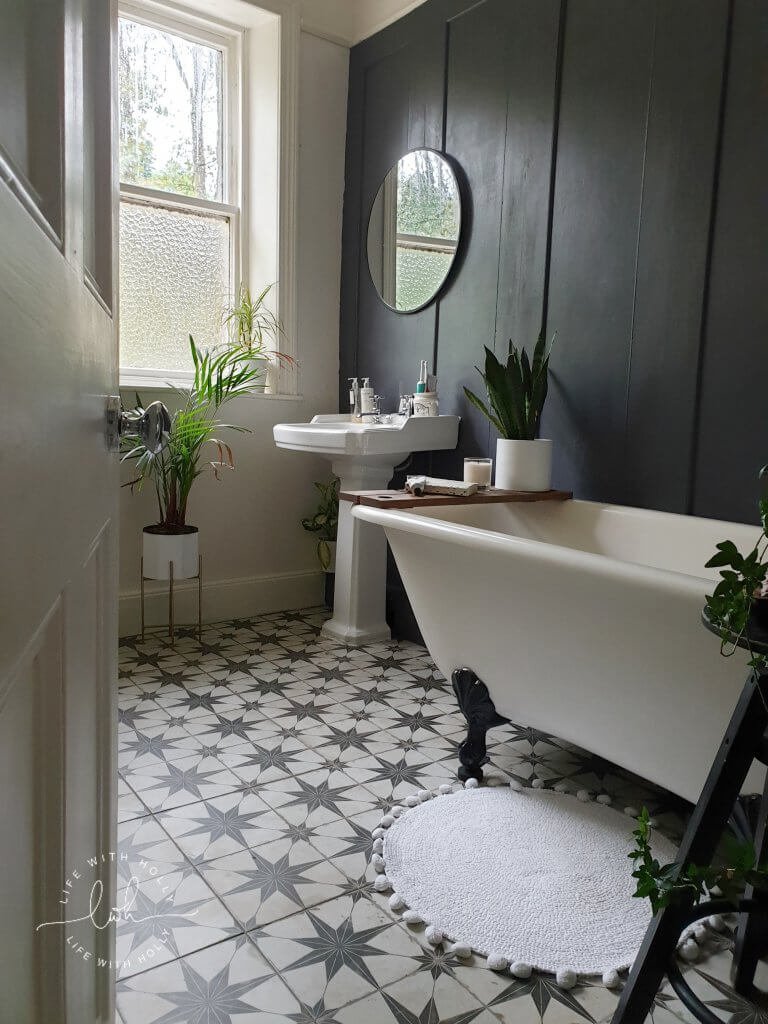
Et voila! The panelling didn’t take us very long at all, and has transformed our bathroom into a more luxurious space. To read more about our bathroom transformation you can click here and to find out how I tiled the bathroom floor, click here.
If you have any questions about this wood panelling tutorial, just let me know!


Omg you may remodel my bathroom – looks lovely!
Oh my God! That looks absolutely gorgeous! I’m in a rental, so unfortunately I can’t do that in my bathroom, but when I buy my own place I’ll definitely give that a go!
The colour scheme is beautiful! I absolute love the traditional bathroom furnishing with some of modern touches. You’ve inspired me!
Wow I absolutely love this bathroom! That tile is gorgeous with the color scheme! Love it all!
Thank you so much x
I love this super chic facelift to your bathroom. You make it look so easy!
Hi holly
What kind of paint do you Recommend using to paint the panels? WAs it a SPecific bath paint?
Hi Yasmin! I used eggshell paint 🙂
LOOKS ABSOLUTELY GORGEOUS! HOW IS THE PANELLING HOLDING UP BEHIND YOUR SHOWER THREE YEARS ON? I WANT TO DO THE SAME IN OUR BATHROOM AND WE HAVE A WALK IN SHOWER BUT I’M WORRIED IT’S NOT WATERPROOF ENOUGH.
Hi! It’s absolutely fine – it look exactly the same as when we did it the first time. We have quite a damp bathroom and I was worried it wouldn’t last but it has! We use a shower curtain in front of it through to protect from a lot of the water so it’s not like a shower cubicle.
Looks gorgeous. Wondering if you’d considered waterproof mdf panelling and whether it wasn’t a good option for any reason? Going to be panelling my bathroom and can’t decide what materials to use. Thank you
It wasn’t something I thought of! It might work for you though.