How We Built a Reclaimed Brick Garden Path – A Tutorial
Are you wondering how to make a reclaimed brick path? We built a reclaimed brick garden path using some old bricks from a Victorian garden wall. Our brick garden path was easy to construct and has added character and charm to our hillside garden. Read more now.
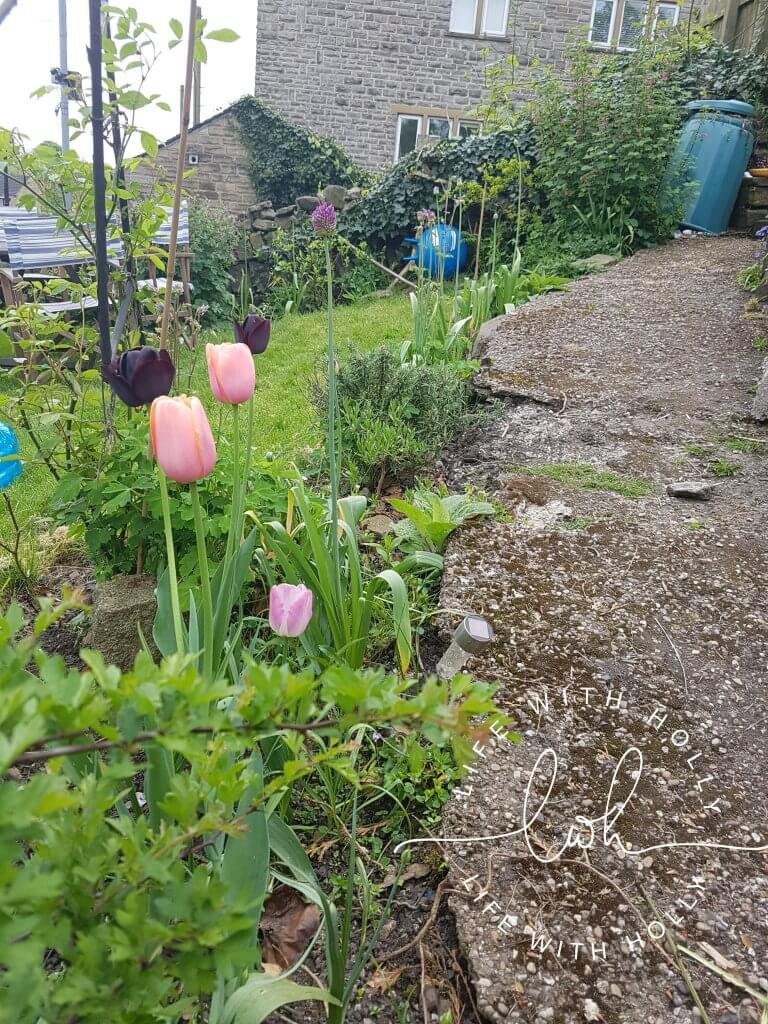
Our garden has the worst path ever. It’s some sort of pebble dash concrete monstrosity that is neither safe nor attractive. It gets so slippery in winter as the pebbles are now polished with years of use, so one sniff of cold weather and the path is like an ice rink, but the surface is also (bizarrely I know) so rough it’ll take a layer of skin off if you fall on it. Not good for a garden where there are kids running around, and not good for when I have clients coming to collect cakes – I don’t want to have spent all week working on a cake for them to slip and throw it all over my garden because of my dodgy path! But now we have a beautiful reclaimed brick pathway.

This post may contain affiliate links, which means I may receive a small commission, at no cost to you, if you decide to purchase the items using the links. Thank you. Read the full Privacy Policy here. For more information please see our Disclaimer page.
So how do you make a reclaimed brick path?
The back of our house is accessed by a single track lane, and on the end of this lane there’s a building site where a Victorian mansion has been demolished and replaced with two big “executive-style” houses. The houses are almost finished however the builders had just started pulling down the original Victorian brick garden wall to put up a fence. Mr R asked the builder if we could have the bricks, and he said yes! The only problem was they were all over the building site, and we had to collect them from there. About a billion trips in Pierre later, we had a huge stack of reclaimed bricks! FOR FREE!
The next step was to smash up our existing path. It had started crumbling away anyways as it was rubbish, and I set to work with a sledge hammer to break up the rest. Our garden unfortunately has no access for diggers and such, so it’s all got to be done by hand. This is probably the reason we haven’t touched the huge rockery and built a retaining wall instead yet! The path was broken up in around an hour as it was so crumbly, and I definitely earned my takeaway calories that day. We bagged up the rubble ready to take to the tip.


The next step (the next day, as we were only working in afternoons due to having to work/do housework/sort Hols out etc) was to level the site. Our garden extends a bit further than the one next door, so I wanted to make sure that next door’s step came down onto a level surface. We dug out a brick’s height down to make sure we could fit the bricks in, but somehow we had dug out too much so we had to fill it back in. There was a lot of that kind of nonsense going on in this project as we had absolutely no idea what we were doing! We used a garden rake in the end to get the levels right as the path slopes and curves – most first time path layers would probably start with a straight flat one but not us!

Once we were level(ish), we used builder’s sharp sand to create a bed for the bricks to sit in. This held them in place and meant we could create a better level for them. As the bricks are reclaimed, they’re not even and not all of them have straight edges so we had to fill bits in, take bits out – it was a process of tweaking as we went along.

I got such bad sunburn doing this! My top rode up exposing the bottom of my back which I didn’t put sun cream on, and because I spent a good while laying bricks in this position I burnt a fabulous stripe on my back. Not a good look!

After browsing on Pinterest we got some ideas for our path, and decided on a kind of herringbone/zig-zag design as it looked relatively easy to do. Turns out I can’t keep to a pattern as when laying the bricks and Mr R was doing the tip run I messed up a few times, but luckily he CAN keep to the pattern and spotted my mistakes before it was too late!

Once we had started putting the bricks in, we put in a rope edge tile. These are original to the terrace, as they came from the neighbour’s garden (they didn’t want them any more and really kindly gave them to us for use in our path! We gave them wine in return). The tiles gave us a beautiful neat edge and matched the ones we have to the other paths further up the garden.
We had to cut some of the bricks to fit in smaller gaps, and for this Mr R used an angle grinder. It made light work of the bricks although the dust all over my garden was awful.

After we had laid the bricks in place, we tweaked the position of the rope edge tiles before we used Postcrete to fix them in place. This stuff dries in no time at all, which is great when you’re impatient like me and want to get a project over ASAP. If a project takes longer than half an hour I generally hate it. It was around £5 for a big 20kg bag which was more than enough for our 5.5m stretch of tiles. We only used cement for the edge tiles to hold them in place.

The actual bricks were grouted using kiln dried sand, which we just brushed into the gaps between them. We had to bob out to buy this and ACCIDENTALLY stopped off at a beer garden to enjoy a wine and some sunshine. Totally slacking off!!

This whole project has made such a difference to our garden and has only really cost us 4 bags of sharp sand and 6 bags of kiln dried sand (oh, and a sledgehammer which I have now called Magnus). We were so lucky to have access to all the free bricks and the edging tiles and to be able to borrow an angle grinder.
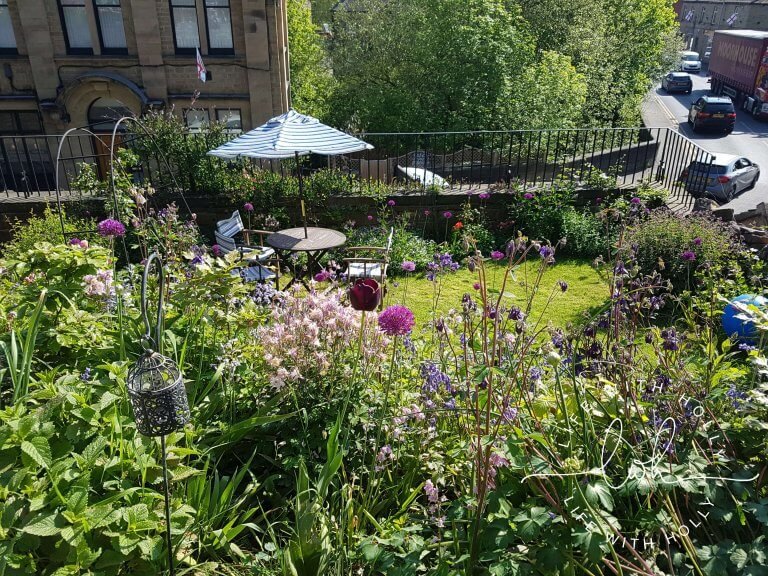
And now I’ve got a bit of extra planting space!


We’ve got another two paths to do, but these are straight and don’t slope AS much, so they should be easier. They’re also much shorter than the section we’ve just done thankfully, as using the sledgehammer has proven I’m not as strong as I think I am! I could barely move the day after breaking up the path haha!


It’s such an easy project though, and the difference is amazing. Our reclaimed brick garden path is now safer and more sturdy, and you’re less likely to lose a layer of skin if you fall over on it. Not that I’m planning to do that though…
See more of the progress of our sloping hillside garden here.
Thanks for reading, and if you have any questions at all just ask away x


Hello! Wondering about the kiln dried sand – did I miss this info? Why kiln dried? Also, how did you get it so level? We’re trying to do a reclaimed brick, stone, and rock patio, but they’re all different heights. Suggestions?
Hi! Thanks so much for commenting. We were just advised to use kiln dried – I don’t remember any specific reason for it! We levelled the builders sharp sand layer before adding in the bricks which were all pretty uniform to begin with. Could you cut some of the larger stones or bricks with an angle grinder to make them level? Or build up some cement underneath them to pack them out? Sorry I’m not much help! Good luck with your path though, I bet it will look amazing when you’ve finished it!
Kiln dried sand is sand that has had all the moisture extracted from it by heat – traditionally in a kiln, but most probably these days by hot air blowers in a factory – regardless, the result is the same, moisture free sand.
This allows the sand to flow freely into all the little nooks & crannies – think of the sand that’s in an egg timer how it runs through that little narrow passage between the two ends, then think what would happen if you put damp builders sand into the same egg timer??
Obviously once the sand is brushed into the joints it will absorb moisture naturally from the atmosphere & become damp but it doesn’t matter once its in the joint, its getting it there in the first place that is the important bit.
If you tried to brush standard (damp) builders sand into the joints it would just clog the at the surface & not go all the way down into the bottom of the joint.
Hope that helps?
Edging tile!!! I found the answer to my question on your other post haha 🙂 🙂 what a score on the materials! lovely work
Thank you so much! I’m glad you found the answer already!
Hello! I love your blog, and your instructions are so clear and honest. It’s a big help for planning 🙂 I’m hoping to carry out a very similar project but my mum has got me worrying that a sloping brick path will be slippery – our garden is impressively sloped in places, and slightly sloped (looks like yours!) in others.
Have you found your brick path slippery at all? 🤔
Ours does get slippery especially as it’s north-east facing and gets very little sun but I regularly brush sand all over it, and it’s been fine since.