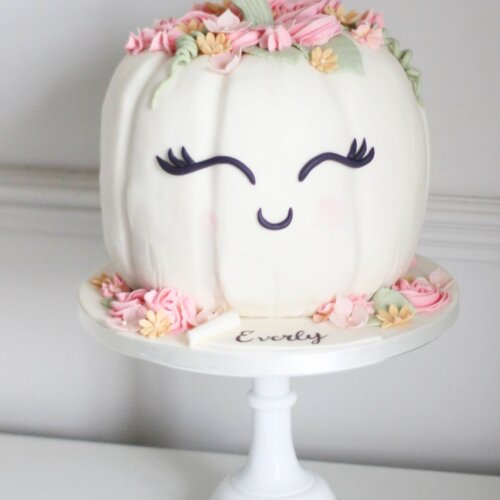
Cute Pumpkin Halloween Cake
If you’re looking for a Halloween cake that’s more cute than creepy, this pastel pumpkin cake is the one. With its sweet little smile and a crown of delicate flowers, it’s perfect for anyone who wants a more gentle take on spooky season. Here's how to make this cute Halloween cake!
Instructions
Bake the Cakes
- Bake 4 layers of 6-inch round cake using your chosen recipe.
- Once baked and cooled, level the tops so they're flat.
- Chill the cakes in the fridge for easier stacking and shaping.
Stack and Carve the Pumpkin Shape
- Stack the 4 layers with buttercream between each layer.
- Use a serrated knife to gently carve the stacked cake into a rounded pumpkin shape - slightly domed at the top and tapering at the base.
- Carve shallow vertical grooves around the cake to mimic the pumpkin's ridges. These don't have to be perfect.
Crumb Coat and Chill
- Cover the entire cake with a thin layer of buttercream to seal in the crumbs.
- Chill for 30 minutes to firm up.
Cover with White Fondant/Sugarpaste
- Roll out white fondant large enough to cover the entire cake.
- Drape it gently over the cake and smooth it down with your hands or fondant smoothers, paying attention to the pumpkin grooves.
- Trim away any excess fondant at the base.
Add the Face
- Roll out black fondant and cut out two curved eyelash shapes and a small smiling mouth. Use a small knife or templates if needed.
- Attach the face to the front of the cake using edible glue or a dab of water.
- Dust on a little pink petal dust for blush cheeks.
Make the Fondant Flowers and Leaves
- Use the pastel fondant and small cutters to create a variety of flowers.
- Add some simple leaves using green fondant - roll into a sausage shape and flatten, then indent with a tool or knife to create veins.
- If you'd like a vine, roll out a thin coil of green fondant and curl it slightly before attaching.
Assemble the Decorations
- Attach flowers and leaves around the top of the pumpkin using edible glue.
- Place a fondant stem in the center top (you can build this from a shaped piece of green fondant).
- Add a few flowers and leaves around the base of the cake for balance.
Finishing Touches
- Place the cake on a cake board and add a name or message if you’d like.
- Display on a pretty stand and get ready for compliments!
Notes
To get finer flowers, add a little Tylose powder to your fondant. This helps strengthen the fondant and you can roll it thinner.
Make your flowers a day in advance and allow them to firm up on some shaped kitchen foil or baking paper overnight.